How to Create DIY Wall Art for Your Home
How to Create DIY Wall Art for Your Home: Unleash Your Inner Artist
1. The Allure of DIY Wall Art: Personalized Expression
Forget mass-produced prints and predictable posters. DIY wall art offers a chance to infuse your personality into your living spaces, crafting pieces that are truly unique and reflective of your individual style. It’s not just about filling empty walls; it’s about creating a visual narrative that resonates with you and your home’s character. The beauty of DIY lies in its flexibility; you control the colors, textures, and themes, tailoring each piece to perfectly complement your existing décor. Moreover, it’s a budget-friendly alternative to expensive artwork, allowing you to refresh your home’s aesthetic without breaking the bank.
2. Gathering Inspiration: Finding Your Creative Muse
Before diving into any project, take time to gather inspiration. Explore interior design blogs, home décor magazines, and online platforms like Pinterest and Instagram. Pay attention to color palettes, patterns, and artistic styles that appeal to you. Consider the overall aesthetic of your home – is it modern, bohemian, minimalist, or traditional? Let these influences guide your creative direction. Don’t be afraid to draw inspiration from nature, travel experiences, or even your favorite books and movies. Save images, create mood boards, and jot down ideas that spark your interest. This curated collection will serve as a valuable resource throughout your DIY journey.
3. Canvas Creations: Painting Your World
The blank canvas is a classic starting point for DIY wall art. Acrylic paints are a versatile and readily available option, offering vibrant colors and quick drying times. Experiment with different painting techniques, such as abstract expressionism, geometric patterns, or even simple ombre effects.
- Abstract Expressionism: Embrace spontaneity and freedom. Use large brushes, sponges, or even palette knives to apply paint in bold, gestural strokes. Don’t overthink it – let your intuition guide your movements.
- Geometric Patterns: Create clean, modern designs using masking tape to delineate precise shapes and lines. Experiment with contrasting colors and layered patterns for a visually striking effect.
- Ombre Effect: Blend different shades of the same color to create a gradual gradient. Use a large, soft brush and work quickly to achieve a seamless transition.
Consider adding texture to your canvas by incorporating materials like sand, fabric scraps, or even coffee grounds. These elements will add depth and visual interest to your artwork.
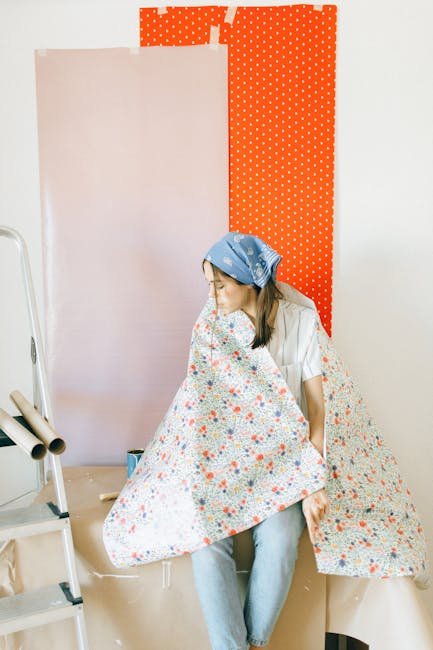
4. Fabric Art: Weaving Wonders on Your Walls
Fabric offers a soft and tactile alternative to traditional painting. Repurpose old textiles, such as vintage scarves, patterned remnants, or even old clothing, to create unique wall hangings.
- Framed Fabric: Stretch fabric tautly over a canvas frame and secure it with staples. This is a simple yet elegant way to showcase beautiful textiles.
- Macrame Wall Hangings: Learn the art of macrame to create intricate knotted designs. This technique is perfect for adding a bohemian touch to your home.
- Quilted Wall Art: Create a small quilt using fabric scraps and batting. The texture and patterns will add warmth and visual interest to your walls.
Don’t limit yourself to traditional fabrics. Explore using unconventional materials like burlap, lace, or even denim to add unexpected texture and character.
5. Nature’s Palette: Bringing the Outdoors In
Nature provides a wealth of materials for creating stunning wall art. Pressed flowers, dried leaves, and twigs can be transformed into delicate and organic designs.
- Pressed Flower Art: Carefully press flowers between the pages of a heavy book for several weeks. Once dried, arrange them on a piece of paper or fabric and frame them.
- Twig Wall Hangings: Collect twigs of varying lengths and arrange them in a geometric pattern. Secure them with glue or twine and hang the finished piece on the wall.
- Seashell Art: Gather seashells from the beach and arrange them in a mosaic pattern on a piece of wood or canvas. Secure them with strong adhesive and add a layer of resin for a glossy finish.
Remember to treat natural materials with care to ensure their longevity. Seal them with a protective spray to prevent fading or damage.
6. Repurposed Materials: Transforming Trash into Treasure
Embrace the principles of sustainability and create wall art from repurposed materials. Old magazines, newspapers, and even bottle caps can be transformed into creative and eye-catching pieces.
- Magazine Collage: Cut out images and text from old magazines to create a collage. Experiment with different layouts and color schemes to create a visually dynamic piece.
- Newspaper Wall Art: Crumple and layer strips of newspaper onto a canvas to create a textured background. Paint over the newspaper with acrylic paints to add color and depth.
- Bottle Cap Mosaic: Collect bottle caps of different colors and arrange them in a mosaic pattern on a piece of wood. Secure them with strong adhesive to create a unique and playful piece of art.
The key to successful repurposing is to think outside the box and find creative ways to transform discarded materials into something beautiful and meaningful.
7. Typography Art: Words as Visuals
Words can be just as powerful as images. Create typography art using calligraphy, hand-lettering, or even stencils.
- Calligraphy Wall Art: Practice your calligraphy skills and create a piece featuring your favorite quote or lyric.
- Hand-Lettered Signs: Paint or stain a piece of wood and use hand-lettering to create a personalized sign.
- Stencil Art: Use stencils to create repeating patterns or lettering on a canvas or piece of wood.
Experiment with different fonts, sizes, and colors to create typography art that reflects your personal style.
8. Photo Displays: Showcasing Memories
Create a personalized photo display to showcase your cherished memories.
- Gallery Wall: Arrange a collection of framed photographs on a wall. Experiment with different frame sizes and layouts to create a visually interesting display.
- String Art Photo Display: String twine or wire across a frame and use clothespins to hang photographs.
- Photo Collage: Create a collage of photographs on a large piece of paper or canvas.
Remember to choose photos that are meaningful to you and that complement your home’s décor.
9. Choosing the Right Placement: Harmonizing with Your Space
The placement of your DIY wall art is just as important as the art itself. Consider the size of the room, the existing furniture, and the overall aesthetic of your space. Hang larger pieces in areas with ample wall space and smaller pieces in more intimate settings. Ensure that the artwork is hung at eye level for optimal viewing. Consider creating a focal point in the room by hanging a statement piece above a fireplace or sofa. Don’t be afraid to experiment with different arrangements until you find the perfect fit.
10. Essential Tools and Materials: Setting Yourself Up for Success
Having the right tools and materials is crucial for a successful DIY wall art project. Invest in a good quality set of paintbrushes, acrylic paints, canvases, and masking tape. Gather essential crafting supplies such as glue, scissors, and a ruler. Protect your work surface with a drop cloth or newspaper. Consider investing in a staple gun for securing fabric to frames and a level for ensuring that your artwork is hung straight. With the right tools and materials at your disposal, you’ll be well-equipped to create stunning DIY wall art for your home.